-
Welcome to Overclockers Forums! Join us to reply in threads, receive reduced ads, and to customize your site experience!
You are using an out of date browser. It may not display this or other websites correctly.
You should upgrade or use an alternative browser.
You should upgrade or use an alternative browser.
Almost done
- Thread starter notarat
- Start date
- Joined
- Nov 11, 2010
- Thread Starter
- #5
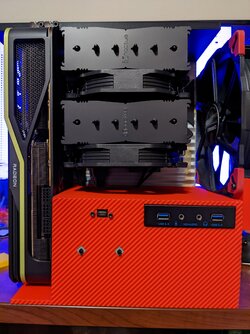
The computer case worked out well. But, I already decided to go ahead and implement Version 2.0 of the design so I disassembled the current build.
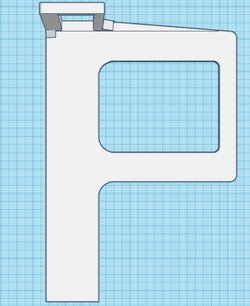
I then redesigned Motherboard tray and rear I/O panel to be a single piece only 5mm thick. I know...it "sounds" like that is too thin. It's not. There is very little "stress" at all on the new tray/IO panel because it mounts to the red case portion and the bottom of the vertically-mounted GPU rests on the case bottom (it acts as a stressed member, giving strength to the design)
Drawbacks of the current build, above, are:
Benefits of Version 2.0 design:

I then redesigned Motherboard tray and rear I/O panel to be a single piece only 5mm thick. I know...it "sounds" like that is too thin. It's not. There is very little "stress" at all on the new tray/IO panel because it mounts to the red case portion and the bottom of the vertically-mounted GPU rests on the case bottom (it acts as a stressed member, giving strength to the design)
Drawbacks of the current build, above, are:
- 3-piece design (Not counting PSU Mount or rear cooling fan)
- Each part takes entirely too long to print (Tray =17+hrs; I/O Panel = 12+Hrs; Red Case portion = 68+hrs = ~100Hrs of print time)
- Entirely too much filament used for what you get from it
- Requires 15+ screws to assemble
- Use of cooling fans (other than the ones on the heatsink) requires "kludges" to get them working (and Drilling a LARGE hole in my pretty motherboard tray)
- Use of knurled nuts (which you "melt" into the mobo tray) weaken the mobo tray and you risk them popping out at some point)
- Creating the "ground" points for the motherboard is not really difficult, but requires additional "kludges" to implement.
Benefits of Version 2.0 design:
- Only 2 parts (Not counting PSU Mount or rear cooling fan)
- Mobo Tray/Rear I/O shield are 1 piece and it takes only 14hrs to print
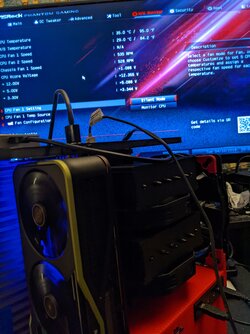
- The new design allows me to easily install a 140mm/180mm cooling fan to cool the back-side of the motherboard and use a heatsink on the nvme SSD on the back-side of the Motherboard.
- Newly-designed red case portion takes less than 38hrs to print
- FAR, FAR less filament used! (Over 50% less!)
- Only 4 Screws to attach the Motherboard tray/Rear I/O panel to the case portion
- Use of M3 Spacers (https://www.amazon.com/dp/B08HL7RXVK?smid=A1THAZDOWP300U&ref_=chk_typ_imgToDp&th=1) allows me to use M3 Nuts and Bolts & washers to secure the motherboard and allows for EASY implementation of motherboard ground for proper grounding of the system.
Love it!
Question(s)... why are you cooling the backside of the motherboard (FX flashbacks?)? There's not a board I've run across (with a 5950X) that needs it.
EDIT: What motherboard do you have, exactly? Googling what's in your signature doesn't come up with anything. I guess if it's an ITX (or maybe mATX), there's an M.2 socket on the backside? That makes sense!
Last edited:
- Joined
- Nov 11, 2010
- Thread Starter
- #7
Love it!
Question(s)... why are you cooling the backside of the motherboard (FX flashbacks?)? There's not a board I've run across (with a 5950X) that needs it.
EDIT: What motherboard do you have, exactly? Googling what's in your signature doesn't come up with anything. I guess if it's an ITX (or maybe mATX), there's an M.2 socket on the backside? That makes sense!
Cooling the back-side because:
I'm using PLA plastic as the material for the Case/Tray/IO Panel and PLA's temperature handling is less than ABS or ASA filament I want to ensure it gets as much cooling as possible.
Rear-Mounted nvme SSD would not be able to use heatsinks without the opening and, as long as I have a heat sink on it, I may as well use a 140/180 to cool it.
My motherboard:
- Joined
- Nov 11, 2010
- Thread Starter
- #10
Some Updates:
I redesigned the motherboard tray to version 2.0. It has a strangthened I/O Panel because I'd rather overengineer it than have it break. I also used 10mm motherboard spacers which necessitated a re-print. (My 6mm motherboard spacers weren't delivered and won't be until mid next week and I wasn't about to wait that long)
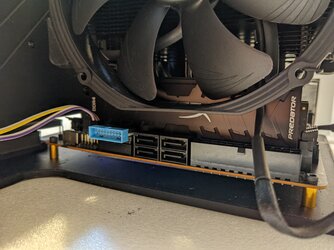
Use of the Noctua NH-D15 Heat Sink necessitates the use of right-angled connectors for Front Panel USB3 and 24-Pin ATX.

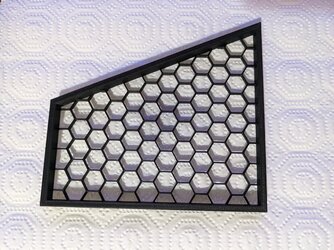
With the re-designed case portion I was able to add grills to both sides. Here's the left one.

The PSU Portion sits in back and isn't seen so I didn't put much effort into designing it. It's currently printing in Brick Red.

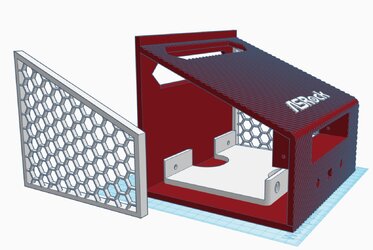
Here's a mock up of what the complete case will look like. I used different colors so you could see the different parts

A closer look at the case portion. It used to be 310mm wide (and printed on its side, it required over 68hrs to print. This newer version requires less (barely) than 24hrs (23H59M21S)
I also added a 3.5" drive mount, but I haven't decided

I redesigned the motherboard tray to version 2.0. It has a strangthened I/O Panel because I'd rather overengineer it than have it break. I also used 10mm motherboard spacers which necessitated a re-print. (My 6mm motherboard spacers weren't delivered and won't be until mid next week and I wasn't about to wait that long)
Use of the Noctua NH-D15 Heat Sink necessitates the use of right-angled connectors for Front Panel USB3 and 24-Pin ATX.
With the re-designed case portion I was able to add grills to both sides. Here's the left one.
The PSU Portion sits in back and isn't seen so I didn't put much effort into designing it. It's currently printing in Brick Red.
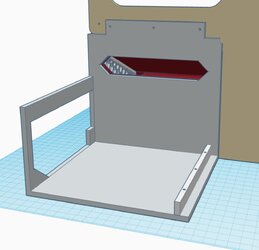
Here's a mock up of what the complete case will look like. I used different colors so you could see the different parts
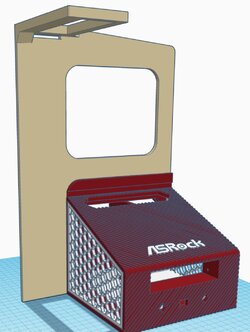
A closer look at the case portion. It used to be 310mm wide (and printed on its side, it required over 68hrs to print. This newer version requires less (barely) than 24hrs (23H59M21S)
I also added a 3.5" drive mount, but I haven't decided
- Joined
- Nov 11, 2010
- Thread Starter
- #11
Here are some pics of the PSU Mount. This is the top, where the cables go through it to the case part, then up to connect to the motherboard or the peripherals in the case part. No. Those aren't "defects" from a "bad print". That's the "Brick Red" filament.
The more I see it, the more I really dislike this Brick Red colored filament.

Here's the left side where the power switch and cord are located. I haven't used my jig to mark/drill the mounting screw holes yet...

Here's the back side where the cables connect. The piece near the bottom is the retention bar for the PSU. It doesn't use standard screws; It uses grub screws so there are no screw heads sticking out.
I'm really bummed with the color of this. I had a roll of Brick Red Overture which looked amazing but I ran out due to the extruder gear issue and power fluctuation issues killing my first two attempts at printing the case using their brick red colored filament.
Why not simply order more? I can't find any on Amazon or anywhere else for that matter.
The case portion is printing (in this same shitty color) and I expect it to be done at around 0200-0400 on Monday
The more I see it, the more I really dislike this Brick Red colored filament.
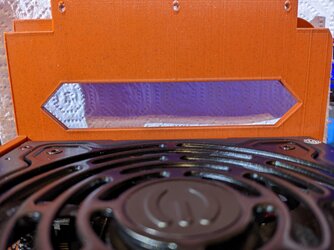
Here's the left side where the power switch and cord are located. I haven't used my jig to mark/drill the mounting screw holes yet...
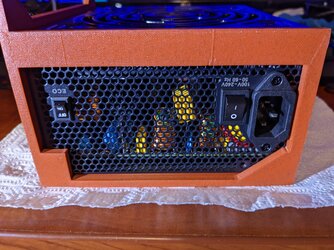
Here's the back side where the cables connect. The piece near the bottom is the retention bar for the PSU. It doesn't use standard screws; It uses grub screws so there are no screw heads sticking out.
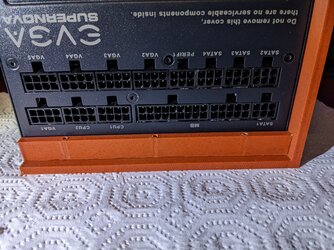
I'm really bummed with the color of this. I had a roll of Brick Red Overture which looked amazing but I ran out due to the extruder gear issue and power fluctuation issues killing my first two attempts at printing the case using their brick red colored filament.
Why not simply order more? I can't find any on Amazon or anywhere else for that matter.
The case portion is printing (in this same shitty color) and I expect it to be done at around 0200-0400 on Monday
- Joined
- Feb 1, 2011
- Location
- Republic of Texas
My son had some power issues and other constraints using his 3D printer for long run projects. I have him an older system and he bought a UPS dedicated to it and hasn't lost a project since. :}
- Joined
- Nov 11, 2010
- Thread Starter
- #13
I had a 1500VA CyberPower UPS about 1ft from the printer but it was still in the box because I wasn't planning to use it for the printer. I was going to move the printer to the part of the room where I could connect it to my 1200VA UPS before starting the print, but I forgot in my haste to get the print started. I paid for it...My son had some power issues and other constraints using his 3D printer for long run projects. I have him an older system and he bought a UPS dedicated to it and hasn't lost a project since. :}
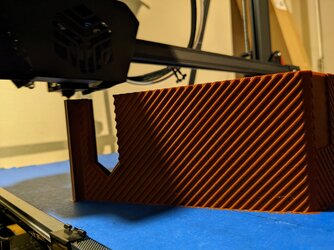
More progress to report:
The bottom case portion is at 43% complete
I reprinted the grills for the case on my Flash Forge Creator Pro, using the silver filament I used for my pretty motherboard tray (which I used a 4" hole saw on, marring its perfect finish)
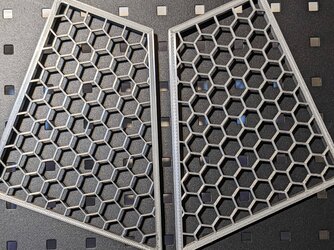
You can't see it in the pic above but I printed the grills on glass so they have a reflective finish to them. This is the exact opposite of the look I was going for with this build but I made the change in direction because while the "Brick Red" filament looks somewhat similar to real brick, it's shiny, not matte like the Overture brick red filament was. Since the case is going to be shiny I decided to make these shiny too.
I'd rather have used matte white on these to make them "pop" better against the brick red filament but I'm out of matte White PLA. All I have are two 3yr-4yr old 3D Solutech spools of shiny white PLA and a roll of Matte White ASA (which works well on my FFC Pro, but I don't want to breath in poisonous vapors)
Here's the side shot of the grill frames showing just a tiny amount of ringing on the part on the left. Not bad considering I've never maintained ANY of my printers. I don't even dust them off for 2-3yrs at a time, lol. I just dust buster them and clean the build plate then throw 'em to work...
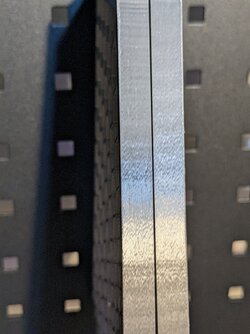
I tried to capture a pic of the reflectiveness of the parts but it's difficult. If you look at it in the right angle, you can not only see the light fixture reflected, you can tell what kind of LED light bulb is being used. (Though that level of detail isn't captured in the pic below)
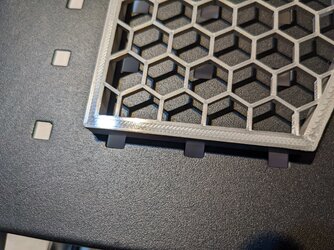
- Joined
- Nov 11, 2010
- Thread Starter
- #15
I have zero CAD skills. I just hack at it until I get something passable.Awesome. Makes me want to get a 3D printer. With my CAD skills I think I could come up with some pretty unique concepts.
- Joined
- Nov 11, 2010
- Thread Starter
- #16
Speaking of hacking at it...Here are some additional progress pics
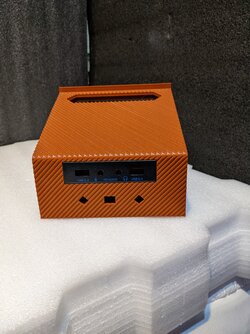
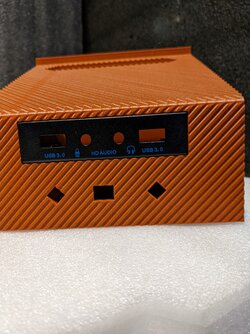
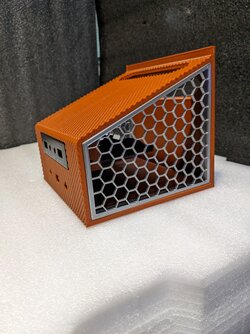
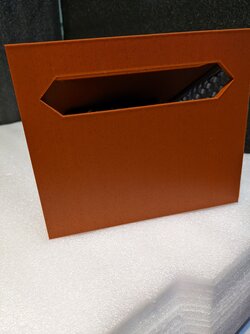
Here's the bottom "case" portion prior to the start of assembly. I have inserted the grills on both sides and the USB I/O panel to test-fit them.
One note: Dimensional accuracy on "a" printer may be "good enough" for everything you create using that printer but, when you're fitting parts printed on one printer to parts printed on another you need to have your $h!t straight. The grills are press-fit. They need nothing to secure them in place. I can shake the crap outta this and they stay put without budging a fraction of a millimeter. Same with the USB panel. I'm please with this aspect.
Pictures 5 & 6 show the case's "edge" in a less than favorable light. That side of the case was the side which was on the build plate (Blue Painter's Tape texture) and I did use a 3-line-wide brim 0.00mm away from the print to give it a tiny extra bit of a footprint. Based on how well it adhered, I don't think I need the brim/skirt any longer but I'm not re-printing the part just to avoid trimming the brim off.
The hard drive mount is printing on the Flash Forge Creator Pro right now (because I forgot to print it last night, lol)
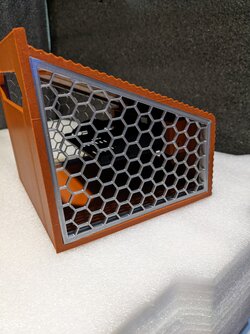
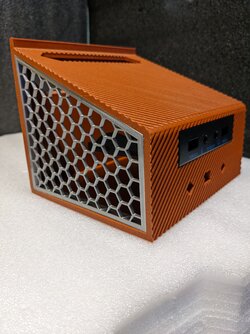
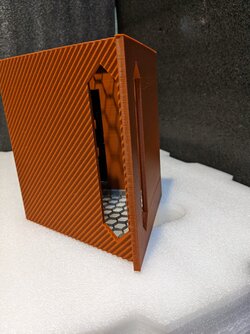
- Joined
- Nov 11, 2010
- Thread Starter
- #17
I'll be loading Win10 on it this week so I consider this one done for now...Have mostly assembled this one and will post pics of the completed system later this week when I'm done connecting everything up.
I've ordered the parts for my next build (5700G, 16GB DDR4, couple 1TB nvme SSDs) and the CPU gets here Friday while the rest of the parts arrive Saturday. (4 rolls of filament arrive Saturday so I am not going to run out like I did with the current build above)
The new build is going to be a bit "different"...
That should give me time to design the case this week and get the printing started.
- Joined
- Feb 1, 2011
- Location
- Republic of Texas
Similar threads
- Replies
- 2
- Views
- 724
- Replies
- 25
- Views
- 3K
