• Welcome to Overclockers Forums! Join us to reply in threads, receive reduced ads, and to customize your site experience!

FEATURED Buidling a Benching Station Navig Style

Overclockers is supported by our readers. When you click a link to make a purchase, we may earn a commission. Learn More.
Thanks!


Final Assembly

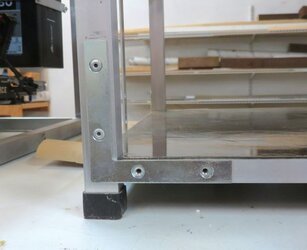
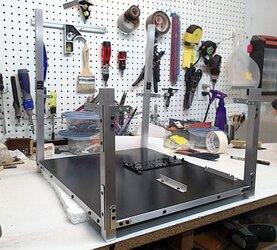
First I attached my 4 posts to the bottom panel.

Each L bracket attaches to panel with 2 screws. So I fit the post to the panel side,making sure everything is nice and square, and mark my holes with a pencil onto the surface of the aluminum trim piece underneath. Then I center punch the holes, drill them with my #36 drill bit, threw the aluminum trim and then down into the MDF panel underneath, to about the depth of ¾”. Then I tap out the holes.


Final%2Bassembly%2Bholes.jpg


Each post has 8 mounting points to the panels, so this process get repeated 32 times!


Got the bottom panel attached:

Final%2Bassembly%2Bbot%2Bpanel.jpg


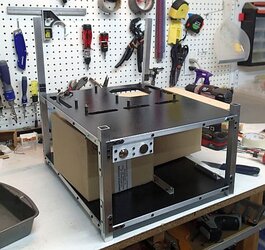
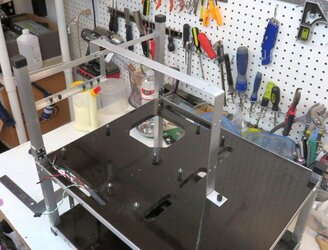
Attached the top panel.

Final%2BAssembly%2BAttaching%2Btop%2Bpanel.jpg


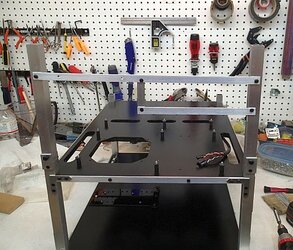
Mounted the PCI bracket.

Mounting%2Bpci%2Bbracket3.jpg


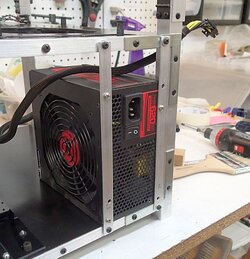
Mounted the power supply bracket:

Final%2BAssembly%2BPSU%2Bbracket.jpg


Mounted the radiator bracket:

Brackets%2Brad3.jpg


And any other brackets such as the Brollocks fan bracket:

Brollocks%2Binstalled1.jpg


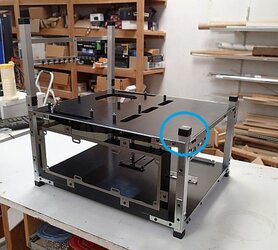
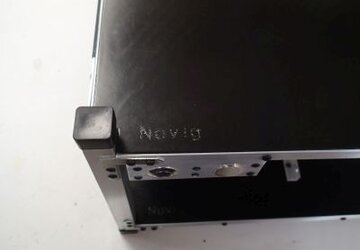
Somewhere along the way, also added black plastic end caps:
McMaster Carr web link:
https://www.mcmaster.com/#92675k43/=19txbqw

Final%2BAssembly%2BPlastic%2BCaps.jpg

When I’m adding the plastic caps, I know I’m pretty much finished!
 
Final Pics

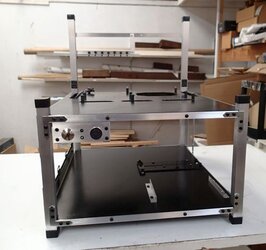
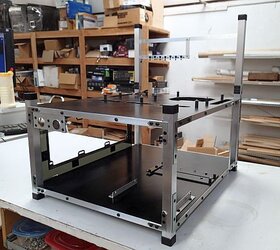
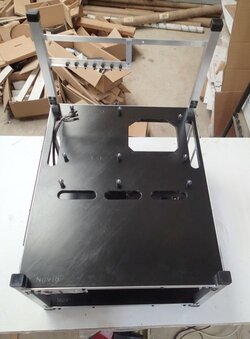
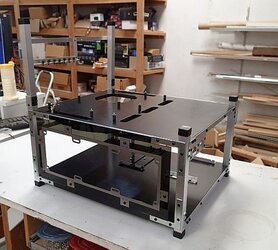
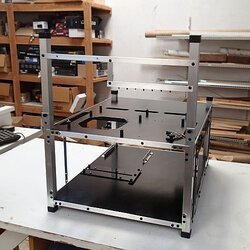
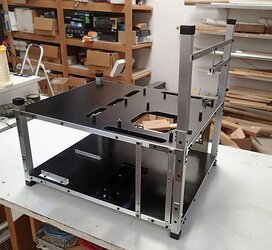
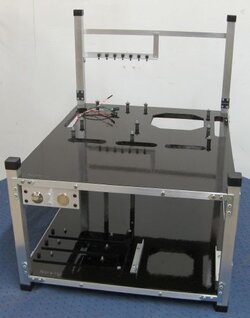
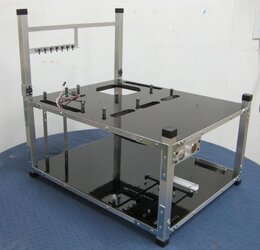
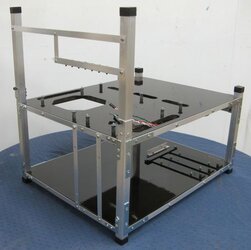
So here some pics of Station#31, my latest build as of Oct 2017.


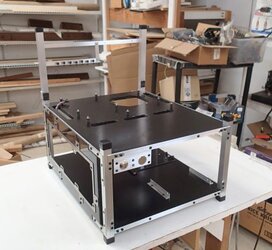
Final%2B31.1.jpg

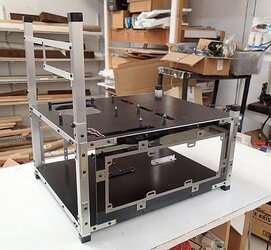
Overall, I feel this is a nice generous size for your standard tinkerer. Motherboard is isolated on the top shelf with stuff for other items. Bottom shelf has space for standard components.


Final%2B31.2.jpg

This client opted for a bottom panel layout of having everything on the right, with space for a radiator on the left.


Final%2B31.3.jpg


Final%2B31.4.jpg

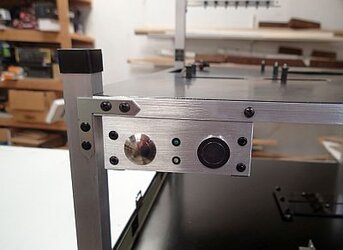
This is my usual switch panel--buttons for power and reset, LEDs for power and hard drive activity. On a brushed aluminum panel.


Final%2B31.5.jpg

My ghosted in logo.


Final%2B31.6.jpg

Generous work surface top panel for the motherboard.


Final%2B31.7.jpg

Radiator side with its mount.


Final%2B31.8.jpg

Back side view.


Final%2B31.9.jpg

This side of the lower panel has the 5.25 bay mount, hard drive mounts, and the power supply mount.
 
Final Pics

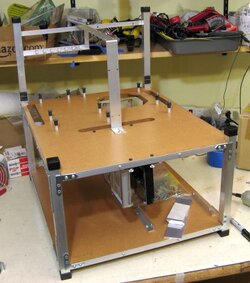
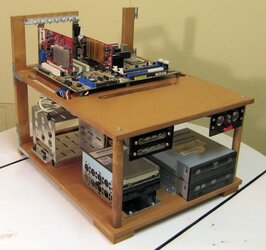
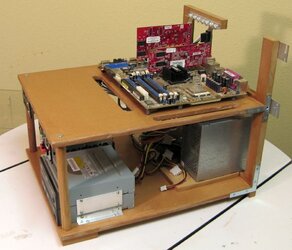
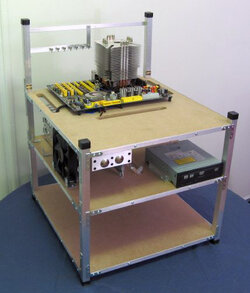
Here is a sample selection of other benching stations based on this design, that I’ve built over the years.


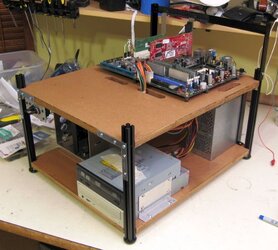
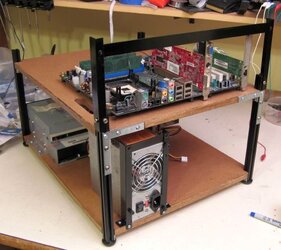
My personal station


Final%2BMystation1.jpg


Final%2BMystation2.jpg


Final%2BMystation3.jpg
 
Thanks!


Final Pics


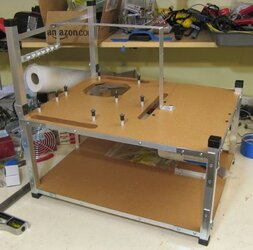
Classic MDF Station

Final%2BUnstained%2BMDF.jpg

Simple straight forward. It’s MDF, but it got a nice warm tone and a thick glossy coat of polyurethane protection.


Final%2BUnstained%2BMDF2.jpg
 
Final Pics


All MDF variation


Final%2BVLC1%2Bfront%2Bangle.jpg


Final%2BVLC%2Bside2.jpg

The All-MDF version, or what I called the Very Low Cost Benching Station was a station I developed to simplify making a benching station.

Its development has its own thread, altho, I haven’t yet updated the photos.

http://www.overclockers.com/forums/showthread.php/620207-The-Very-Low-Cost-DIY-Benching-Station


Instead of mating wood panels to aluminum framework with a thousand screws, I went all wood with some classic wood joint-ing. Notice no more metal posts--instead 2 wooden round posts up front, and then a back vertical panel mated to the horizontal panels with dado joints (reinforced with some metal brackets).

This makes building a station very inexpensive (both in materials and time of construction) yet super sturdy.
 
I have in fact branched out into making furniture around the house, based on what I learned from making benching stations!


Final Pics


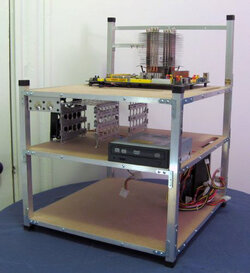
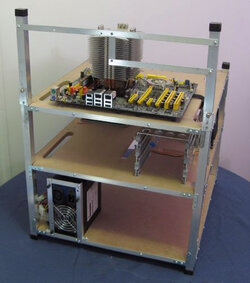
3 layered station

Final%2B3level1.jpg

Customer wanted a 3 layered station, so why not?


Final%2B3level2.jpg


Final%2B3level3.jpg
 
Final Pics


This--I believe--is the very first station I ever built--September 2007!

Final%2BFirst1.jpg


Final%2BFirst2.jpg
 
Parts List

Main structure
Panels x2: ½” MDF 470mm x 380mm, corners notched by 11/16”
Posts x4: ¾” square aluminum tube, 1/16” wall thickness, 255mm
L brackets x16:

PCI mounting system
PCI extension posts x2: ¾” square aluminum tube, 1/16” wall thickness, 210mm in length
PCI mounting shelf: ½” aluminum corner, 1/16” thickness 200mm in length
PCI vertical support: ½” aluminum trim, 1/16” thickness 65mm in length
PCI horizontal long bar: ½” aluminum trim, 1/16” thickness 375mm in length
Miniature ¾” hinges x2, matching small mounting screws
Vertical post stabilizer brackets x2: ¾” aluminum angle, 1/16” thickness, 30mm in length
6-32 thumb screws to secure the flip-up PCI bracket, and then for each PCI device

Trim
Short sides of panels x4: ½” aluminum trim, 1/16” thickness 345mm in length
Long sides of panels x4: ½” aluminum trim, 1/16” thickness 435mm in length
¾” square tube end caps

Paint
Pre-stain solution
If desired: Your choice wood stain
Gloss or semi-gloss polyurethane

Fasteners
6-32 machine screws ⅜” length
⅛” rivets, with rivet nuts
M3 x 6mm (to mount 5.25 bay units as well 2.5” hard drives)
6-32 Thumb screws (for flip-up PCI bracket system, for DIY Hard drive brackets, for various other brackets)

Switch panel
Panel: 1.5” aluminum trim, 1/16” thickness, 10mm in length
Chrome Vandal style buttons x2
LEDs x2 with mounts
PC replacement wiring kit

Hard drive rack
Pre-fab rack
See separate thread on my DIY hard drive rack

5.25 rack
Pre-fab rack
DIY: x2: ½” aluminum corner, 1/16” thickness, 10mm in length, for first bay.
For more than one bay, x2: 1.5” aluminum bar, 1/16” thickness, 10mm in length
M3 x 6mm screws to mount drives

Motherboard mounts
Standoffs x10 :6-32 Rubber Well nuts aka rivet nuts
Thru screws x10 :6-32 machine screws, length is variable
Lock-down nuts x10: 6-32 brass knurl nuts

Power supply bracket
Brackets x2: ½” aluminum trim, 1/16” thickness, 205mm in length

Other brackets
Brollocks Fan Bracket: 1” aluminum trim, 1/16” thickness, 625mm in length


For my last section, I will post a hyperlinked table of contents for each section of this thread, which might take a little while to compile....
 
Thanks! Not 100% certain, but I think I got it from Home Depot. It has several heads to interchange for different rivet sizes.
 
Hyperlinked Table of Contents


Introduction

Getting Started--Materials and Tools


Construction Approach

Main Structure: Panels
Step#1 Cut the panels to size/Tools for cutting your wood panels
Step#2 Notch the corners of the panel
Step#3 Locate your motherboard

Side note on Holes and Screws

Tools for drilling a hole
Drilling Holes in Different Materials
. Drilling Holes in Wood
. Drilling Holes in Metal
. Drilling Holes in Plastic
. Summary for Drilling Holes in Different Materials
Drilling bigger holes

Side Note on Screws

Machine Screws
Wood Screws
Creating Threaded Holes
Tapping Wood

Main Structure: Panels
Step#4 Mount your Motherboard
Step#5 Make you panel cutouts
The Router
. Router Basics
. Router Setup

The Under the CPU socket cutout
The Under the CPU socket cutout--Advanced Routering!
. Principle #1: The Jig

. Principle #2: Depth Control
Main Structure: Panels Complete!

Main Structure: Posts

Working with Square Tube Aluminum
Process for cutting square tube aluminum

Finishing aluminum--the brushed look
Attaching brackets
Folding PCI brackets

Trim/Aesthetics
Finishing the Panels
Finishing the Panels: the Navig treatment
Step 1--Mask the top side
Step 2--Sand the bottom side
Step 3--Clean
Step 4--Apply pre-stain
Step 5--Apply the stain

Step 6--Apply the first coat of high gloss polyurethane
Step 7--Apply the second coat of high gloss polyurethane
Step 8--Sand
Step 9--Apply the third coat of polyurethane
Step 10--Consider more coats then let fully dry

Step 11--Mask the bottom (just painted) side
Step 12--Prep the top side
Step 13--Apply pre-stain and stain
Step 14--First 2 coats of polyurethane

New Sanding Technique
Step 15--Sand with 220 grit
Step 16--Add the ghost logo
Step 17--Apply the final coats of polyurethane (one or two)


Bracketry
PCI bracket
. Mount the bracket
Hard drive racks
. My DIY Hard Drive Bracket System
. Hard drive caddies
. Hold down unit

5.25 Bay rack
Power Supply Brackethttp://www.overclockers.com/forums/...-Navig-Style?p=8016347&viewfull=1#post8016347http://www.overclockers.com/forums/...-Navig-Style?p=8016347&viewfull=1#post8016347http://www.overclockers.com/forums/...-Navig-Style?p=8016347&viewfull=1#post8016347http://www.overclockers.com/forums/...-Navig-Style?p=8016347&viewfull=1#post8016347
Switch Panelhttp://www.overclockers.com/forums/...-Navig-Style?p=8016919&viewfull=1#post8016919http://www.overclockers.com/forums/...-Navig-Style?p=8016919&viewfull=1#post8016919http://www.overclockers.com/forums/...-Navig-Style?p=8016919&viewfull=1#post8016919http://www.overclockers.com/forums/...-Navig-Style?p=8016919&viewfull=1#post8016919
Miscellaneous Brackets--The Brollocks Fan Brackethttp://www.overclockers.com/forums/...-Navig-Style?p=8018592&viewfull=1#post8018592http://www.overclockers.com/forums/...-Navig-Style?p=8018592&viewfull=1#post8018592http://www.overclockers.com/forums/...-Navig-Style?p=8018592&viewfull=1#post8018592http://www.overclockers.com/forums/...-Navig-Style?p=8018592&viewfull=1#post8018592
Miscellaneous Brackets--Radiator Mountshttp://www.overclockers.com/forums/...-Navig-Style?p=8034672&viewfull=1#post8034672http://www.overclockers.com/forums/...-Navig-Style?p=8034672&viewfull=1#post8034672http://www.overclockers.com/forums/...-Navig-Style?p=8034672&viewfull=1#post8034672http://www.overclockers.com/forums/...-Navig-Style?p=8034672&viewfull=1#post8034672

Final Assembly
Step 1--Prep the panels, posts, and brackets
Attach the 4 posts to the bottom panel
Attach the top panel
Mount the PCI bracket
Mount the Power supply bracket
Mount the radiator bracket
Mount any other brackets such the Brollocks fan bracket
Add plastic end caps


Final Pics

Station #31
My personal station
Classic MDF station
All MDF variant
3 layered station
The first station I ever built

Parts List

Hyperlinked Table of Contents
 
And this project is DONE!

Thanks to all my supporters and my family!

Truly hope you find this thread as a nice reference, and maybe even a little inspiration. My whole point is this: go out and try to build something.

Navig
 
Back